 How-to
How to Prevent Leaks in Sunroom Additions: 2026 Guide
Table of Contents
- Start With a Leak-Diagnosis Walkthrough
- How to Prevent Leaks in Sunroom Additions With a Seasonal Inspection Checklist
- Sunroom Roof Flashing: The Joint That Decides Whether You Stay Dry
- Choosing Sunroom Sealant for Roof Leaks and Seams
- Sunroom Window Leak Repair and Door Seal Maintenance
- Fixing Sunroom Drainage Problems Before Heavy Rain Arrives
- Prevention During Design and Construction
- When to Stop and Call a Professional
- Frequently Asked Questions
Last Updated: October 18, 2026
Start With a Leak-Diagnosis Walkthrough
Most homeowners reach for a caulk gun the moment they spot a drip. That is the wrong first move. Water rarely enters where it shows up, so sealing the visible spot often traps moisture and pushes the leak somewhere worse.
Learning how to prevent leaks in sunroom additions starts with finding the true entry point. At Milton Sunrooms, we have built and repaired sunrooms across north Fulton County since 2008, and the pattern is consistent: the drip on your floor is usually several feet from the gap.
Trace the Water Before You Touch a Tube of Caulk
Follow the water backward, not forward. Work from the inside stain up to the roof, then out to the nearest joint, seam, or flashing. A few rules of thumb:
- Water travels along framing. It can run sideways for feet before dropping.
- Check the highest point first. A ceiling stain near a wall usually means a roof-to-wall flashing failure.
- Look for rust, rot, or soft wood. These mark a long-running leak, not a new one.
A roof leak in a sunroom is a symptom. The cause is almost always a failed joint, a blocked drain, or a bad seal. Diagnose first, repair second.
How to Prevent Leaks in Sunroom Additions With a Seasonal Inspection Checklist
Prevention beats repair every time. A sunroom inspected twice a year will outlast one that only gets attention after a storm. Here is the checklist we walk clients through.
| When | What to Check | Why It Matters |
|---|---|---|
| Early spring | Roof seams, flashing, caulk lines | Winter freeze-thaw opens cracks |
| Early spring | Gutters and downspouts | Spring rain tests drainage |
| Late summer | Window and door seals | Heat and sun dry out sealant |
| Late fall | Roof panels, fasteners, flashing | Prep for snow and ice |
| Late fall | Drainage slope and pooling spots | Standing water freezes and expands |
- Walk the roof line and look for lifted or cracked sealant
- Check flashing at the house connection for gaps
- Clear gutters and confirm downspouts flow freely
Sunroom Roof Flashing: The Joint That Decides Whether You Stay Dry
Sunroom roof flashing is the metal or membrane strip that seals the connection between the sunroom roof and the house wall. It is the most leak-prone joint in any addition and where most recurring leaks begin.
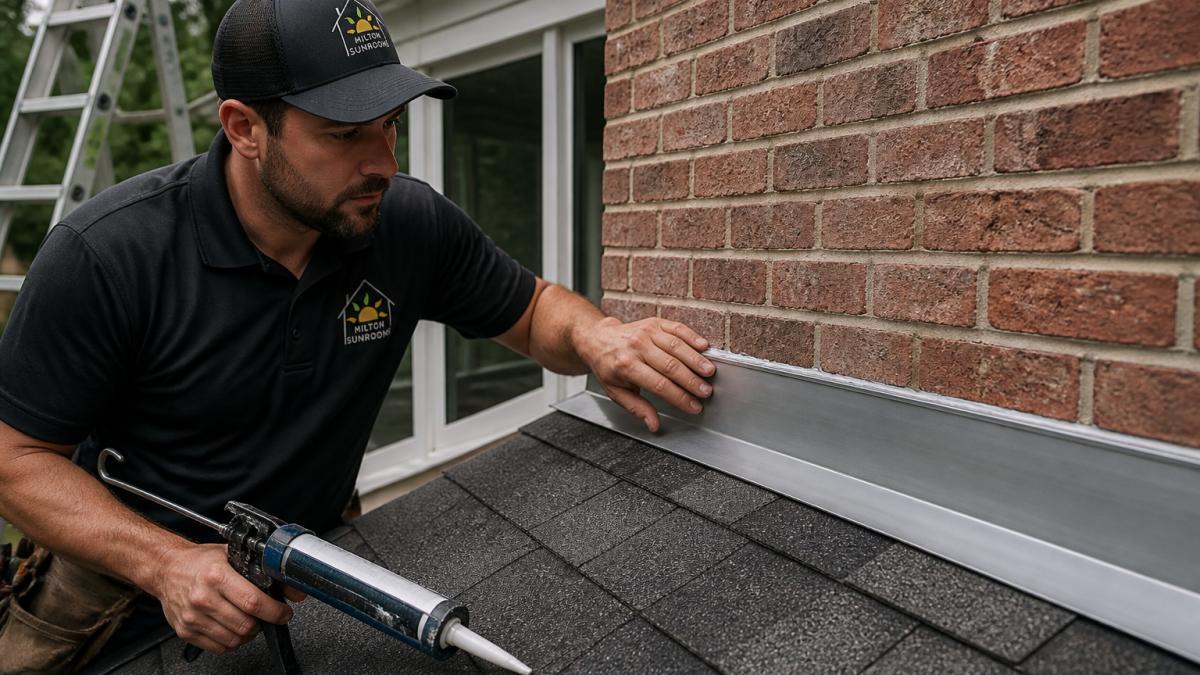
Where Flashing Fails at the Roof-to-Wall Connection
The roof-to-wall connection takes the most stress of any part of the structure. The house and the sunroom settle at different rates, and that movement pulls flashing loose over time.
Common failure points:
- Wide flashing that was never tucked into the wall. It sits on the surface and lets water behind it.
- Galvanized steel flashing that has rusted through. Metal flashing needs to be rated for the environment.
- Copper flashing installed without proper step flashing. Water gets under the edge.
Proper flashing is layered, lapped, and mechanically fastened, with the top edge tucked into a reglet or under siding. If yours is surface-caulked, expect it to fail.
Choosing Sunroom Sealant for Roof Leaks and Seams
The right sunroom sealant for roof leaks depends on the joint, the substrate, and how much movement that joint sees. No single product handles every seam, and the wrong one is a top cause of repeat failures, and, in some cases, a voided manufacturer warranty.
Silicone, Polyurethane, Roofing Cement, or Butyl Tape?
- Silicone caulk: Best for glass-to-frame and metal-to-metal joints. Stays flexible, resists UV, but will not accept paint and does not bond well to dirty, wet, or oily surfaces. Neutral-cure silicone is the safer choice around metal; acetoxy-cure silicone can corrode bare metal and should not be used on aluminum frames.
- Polyurethane sealant: Best for roof seams, panel joints, and masonry-to-metal transitions. Strong adhesion, paintable, handles movement well. It skins over quickly, so tool the bead within the working time listed on the cartridge.
- Roofing cement: Best for patching small holes and filling gaps under flashing. Not a substitute for a proper seal on moving joints, it cures rigid and cracks when the joint flexes.
Match the sealant to the material and the movement: a flexing joint needs a flexible product, not a rigid patch, while a joint that never moves, a masonry reglet, for example, can take a stiffer sealant that resists sagging.
Material Compatibility and Warranty Traps
Before you buy a tube, read the label for the substrates it bonds to and the substrates it damages. A few rules that prevent expensive mistakes:
- Do not mix chemistries on the same joint. Silicone will not bond to cured polyurethane, and polyurethane will not bond to cured silicone. If you are re-sealing a joint, remove the old bead completely rather than layering a new product over it.
- Check the roof panel manufacturer's spec. Many glass, polycarbonate, and insulated-panel roof systems specify an approved sealant and flashing system. Using an unapproved product at a panel lap or perimeter can void the panel warranty, even if the sealant itself performs well.
- Avoid acid-cure silicone on metal. Acetoxy-cure silicone releases acetic acid as it cures, which can etch bare aluminum and corrode fasteners. Neutral-cure silicone is the default around metal frames.
How to Tell Whether a Repair Will Last
A repair that fails within one season usually failed for one of four reasons: the surface was not clean and dry, the old sealant was not fully removed, the product was wrong for the joint's movement, or the underlying cause, a blocked drain, a loose fastener, a failed flashing lap, was never fixed. Before calling a repair done, confirm the joint is clean, the bead is continuous and tooled, the product is rated for the substrate, and the original water path has been corrected.
Sunroom Window Leak Repair and Door Seal Maintenance
Windows and doors are the second most common source of water intrusion after the roof-to-wall joint. Sunroom window leak repair usually comes down to failed seals, clogged weep holes, or poor installation, but the fix depends on which is happening and on your frame and glazing system.
Trace the Entry Point Before You Re-Caulk
Water at a window sill rarely enters at the sill. Work backward from the interior symptom to the exterior detail:
- Staining on the interior head or side jamb points to a failed perimeter seal or a missing head flashing above the unit.
- Water on the sill or floor at the frame base points to blocked weep holes, a failed sill pan, or a threshold that is not sloped to drain.
- Fogging or water between the panes means the glazing seal itself has failed; no exterior caulk will fix that.
Run water low and slow against one detail at a time, head, then sides, then sill, and watch for the interior drip. That isolates the entry point faster than resealing everything.
Frame and Glazing Systems Change the Repair
- Vinyl-framed windows and doors: Weep holes and sill slope do most of the drainage work. Keep weep holes clear, confirm the sill slopes to the exterior, and use a flexible exterior-grade perimeter sealant, since vinyl moves with temperature.
- Aluminum-framed systems: Thermal movement is larger, and joints between frame sections are common leak points. Check the corner gaskets and the setting block under the glass; a shifted setting block can open a path at the glazing bead.
- Wood-framed units: Look for soft wood and paint failure at the sill and lower corners. A wet wood sill rots the frame from the inside out, so repair the water path before repainting.
Weep Holes, Weatherstripping, and Thresholds
Check these on every window and door:
- Weep holes: Small drainage slots at the bottom of frames. If blocked, water backs up and enters the room. Clear them with a wire or compressed air, never seal them.
- Weatherstripping: Worn or flattened strips let wind-driven rain through. Replace with the same profile and material as the original; a mismatched profile can bind the door or fail to seal.
- Glazing seals: The seal between glass and frame shrinks with age and sun exposure. If water is coming through the glass itself, the glazing seal has failed and the unit likely needs replacement.
Repair or Replace?
Re-caulk and re-weatherstrip when the frame is sound, the glazing is clear, and the leak traces to a perimeter joint or worn sweep. Replace the unit when the glazing seal has failed, the frame is soft or corroded, or the leak returns after two proper repairs at the same detail. A failed glazing seal on an insulated glass unit cannot be repaired in place.
Fixing Sunroom Drainage Problems Before Heavy Rain Arrives
Sunroom drainage problems cause more leaks than most homeowners realize: water that cannot leave the roof finds another way in, usually through seams and flashing.
Roof Slope, Gutters, and Standing Water
A sunroom roof needs enough slope to shed water. Flat or low-slope roofs depend on a membrane and proper drainage, and fail fast when either is compromised.
Watch for these warning signs:
- Water pooling on the roof after rain
- Standing water in gutters or at the base of downspouts
- Overflow during heavy rain, which sends water behind flashing
Clean gutters at least twice a year, confirm downspouts discharge away from the foundation, and check that the roof slope directs water to the drains. If water sits more than a day after rain, the drainage needs attention.
Prevention During Design and Construction
The cheapest leak to fix is the one designed out before construction. Most sunrooms we build start with leak prevention baked into the plan, not added later.
Design decisions that matter:
- Choose the right roof system. An insulated roof system handles temperature swings better and reduces condensation, a hidden leak source.
- Specify proper flashing from day one. Wide flashing, step flashing, and a reglet cut into the wall.
- Repurpose existing structures carefully. An old deck or porch may need reinforcement and a new drainage plan.
This is where an experienced contractor earns their keep. A sunroom built to shed water correctly needs far less repair down the road.
When to Stop and Call a Professional
Some leaks are a weekend project. Others need a pro, and guessing wrong costs more than the repair.
Call a professional when you see:
- Recurring leaks that return after you reseal
- Water behind siding or inside walls
- Soft or rotted framing near the leak
Structural repairs, flashing replacement, and roof panel work are not DIY territory. A botched repair can void a manufacturer warranty and turn a small leak into a rebuild.
At Milton Sunrooms, we have seen too many sunrooms damaged by quick fixes that trapped water instead of stopping it.
Frequently Asked Questions
Do sunroom additions actually leak?
They can, and the weak points are predictable: roof seams, the flashing where the sunroom meets the house, window and door seals, and clogged gutters. A sunroom built with a proper roof slope, wide metal flashing, and quality sealant resists water intrusion well. Most leaks trace back to skipped maintenance or a joint that was sealed once and never checked again. An annual inspection in spring and fall catches most problems while they are still a $20 tube of sealant instead of a rotted frame.
What is the best sealant for a sunroom roof leak?
It depends on the joint. For roof panel seams and small cracks, a silicone or polyurethane sealant rated for exterior roofing holds up to sun and rain. Where panels overlap, roofing cement works as a supplement. For the roof-to-wall connection, sealant alone is not enough: metal flashing, ideally galvanized steel or copper, should sit behind the joint with sealant as a backup. Match the sealant to the material (metal, vinyl, wood, or brick) and never layer silicone over an old silicone bead, because the new coat will not bond.
How often should sunroom roof seals and flashing be inspected?
Twice a year, in early spring and late fall, plus after any severe storm. Check the flashing at the roof-to-wall connection, every roof seam, the caulk lines around windows and doors, and the gutters and downspouts. Look for cracked or peeling sealant, rusted or lifted flashing, and granules or debris collecting in corners. A five-minute walkthrough on a ladder after heavy rain season is the cheapest leak prevention you can do, and it keeps small failures from turning into recurring leaks.
Can poor drainage cause a sunroom to leak?
Yes. Sunroom drainage problems are one of the most common reasons water ends up inside. When gutters clog or a downspout discharges next to the foundation, rainwater backs up under roof panels, pools on low-slope sections, and eventually finds a seam. Standing water is the warning sign. Clear gutters twice a year, confirm the roof slope drains toward the gutter, and extend downspouts so water moves away from the sunroom. If water pools on the roof after a heavy rain, the slope or panel alignment needs attention.
A sunroom should be a space you enjoy year-round, not one you dread every time it rains. If you are dealing with a stubborn leak or planning a new addition, get it right the first time. Get a Free Quote from Milton Sunrooms and let our team design a sunroom built to stay dry, comfortable, and bug-free for years to come.